Friday, November 22, 2013

Lori Whitlock - December Daily Kit and a Countdown Christmas


I had so much fun creating this Christmas Countdown using Lori Whitlock's newest December Daily kit available at Jessica Sprague.  I made the templates  to fit the boxes in photoshop, then used them as clipping masks and clipped the papers to them, resized accordingly and added a little bling.  I also used Epiphany Crafts Round 25 bottle caps on a few of the drawers.  The Christmas Tree box came from Hannah's Home Accents in Antioch, IL. 

Friday, November 15, 2013

Lori Whitlock - New Releases this week at Jessica Sprague.com


Hi there!  It's Friday and that means another new release from Lori Whitlock! 
Look at the adorable templates she's releasing this week.  The card above is just one of her new release in the Christmas Cards Set #4.  When I saw this card, I just knew I wanted to use this fun Christmas photo I took a two years ago of my sweet Golden Retriever.  It's so simple to create a fun, personalized Christmas Card with Lori's Templates.  You can simply just add a photo in Photoshop, or, if you're not a Photoshopper, she also offers the file in png format, that way you can easily use any photo software to simply add your own photo.  The only thing I added to this card was the "with love" text and the poinsettias... (they are from Lori Whitlock's Christmas "Reflections" collection available at Jessica Sprague.

In addition to the fun Christmas Card releases, Lori's got several 2014 calendars ready for you to personalize wit your favorite photos!   I chose this fun 3 photo template to make a handy year calendar for my refigerator.... (you gotta have one for the fridge... right?!?!?!).  Anyway... go check out the fun releases by Lori Whitlock at JessicaSprague.com!!


Tuesday, November 12, 2013

Heidi Swapp / Epiphany Crafts - Insta Christmas Mini Album


Hello!  I am so excited to show this fun and interactive Album I made for my Epiphany Crafts Project Featuring Heidi Swapp.  Yes, that's right.. this is Heidi Swapp week over at Epiphany Crafts!
I made this album to house all those Christmas IPhone photos I plan to take as well as a few favorites from recent Christmases past.


I made this album with a hard back book I bought at the Dollar Store.  I simply removed all of the inside pages and then added an extension on the back flap to make a magnetic closure.  Check out Heidi Swapp's My Craft Channel Tutorial for instructions on the magnetic closure.  I followed the exact same procedure except I used an actual book cover instead of chipboard.


The photo above shows the layers and layers of inside pages.  I used an Epiphany Crafts Round 25 tool, epoxy and charm to make the cute "Joy to the World chain inside.  Heidi's Believe  6 x 6 collection has so many fun pages that fit perfectly with the Round 25 tool


I'll flip though a couple of pages for you.  There are lots of blank pages and places for journaling and future photos.  It will be so easy to just pop the photos in as I get them developed.


That's a good look at most of the pages, if you'd like to see the album in it's entirety, check out my YouTube Video


Thanks for looking!  Have a great day!!!

Sunday, November 10, 2013

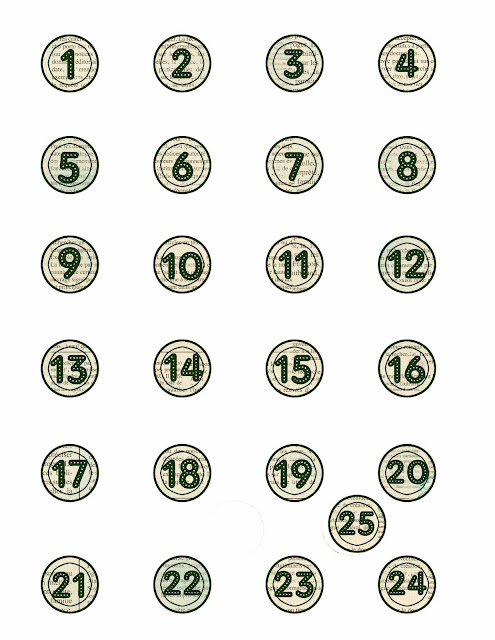
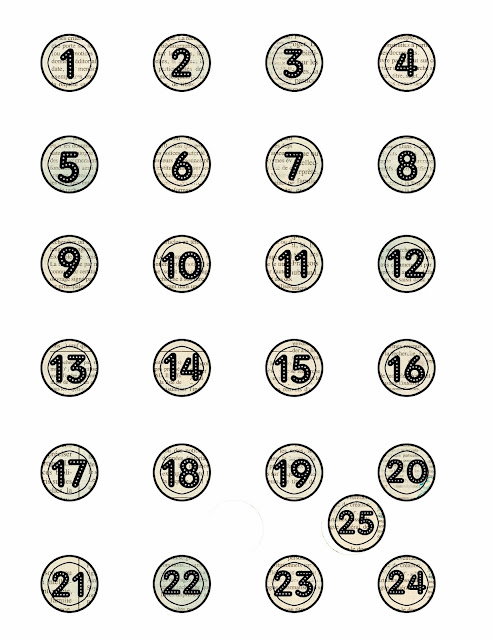
Christmas Countdown Freebies for the Epiphany Crafts Studio Shape Round 25 Tool


I Created these three sets of Christmas Countdown numbers to fit in the Epiphany Crafts Shape Studio Round 25 Tool.   I made Red, Green and Black, so you can match all of your Christmas Projects.  Just Click on the photo to download the color you want.

http://www.4shared.com/office/KrL9bsxJ/GREENCountdown.html

http://www.4shared.com/office/tP9AiKof/BLACKCountdown.html

Friday, November 8, 2013

Fall Fun with Epiphany Crafts


It's Fall Fun Week over at Epiphany Crafts.  For my Fall Project I made an 8-1/2 x 11 layout using the Epiphany Crafts Shape Studio Square 25 tool and some fun patterned papers.

I love how the die cut leaves turned out.  I used my Silhouette Cameo to cut our various leaves which I inked with Tim Holtz distress inks.  


The Epiphany Crafts Shape Studio Square 25 Tool adds just a little something extra to the layout.  I really like how all of the patterns, colors are different, but blend very well with the fall theme.

By the way... the gang in the photo are my Son, Daugther and Son-in-Law and his siblings.  They did a photoshoot for his mom and I last year for Christmas.  I thought this was such a cute photo.

Monday, November 4, 2013

Lori Whitlock Blog Hop


Welcome!  I'm so glad you're playing along on Lori Whitlock's blog hop.  You should have arrived here from Mary Moseley.   If you didn't or in case you got lost along the way, I have the entire list at the bottom of the post.  Make sure and check out all the fun Christmas Cards created with Lori Whitlock's products. 
Hi there!  I was so excited to hear about this Blog Hop!  What a fun way to get to know everyone and see a brief taste of Lori Whitlock's designs!   I made a variety of cards.  The first card is a 4 x 8 printable photo card.  It was super simple to make using Lori Whitlock's Echo Park Reflections Collection.   It is a huge collection and full of papers and ephemera.  A must have for the holidays!

Next up, some fun hybrid cards.


I made these cards using Lori Whitlock Christmas Day and Christmas Eve Collections  These two collections are especially fun for the younger ones in your life.  It's packed full of cute penguins, Santa, Christmas Trees, etc.  So super fun!For this card 
For this card I used my Silhouette and Lori Whitlock's Bracket Easel Card from the Silhouette Store Item #46299 and the Chritmas Day Collection  I added a little glitter to Santa's coat and hat for a little extra bling.

This card (center) was made with the Christmas Eve Collection and Lori Whitlock's Silhouette Card Chevron Shape  (Item #44887).  I added a little bit of glitter to the rim of the Penguin's hat and a bit of inking on the edges.

The last card is also the Christmas Day Collection as well as Lori's Silhouette "5 Label Shapes" for the Happy Holidays flag.

Now for the fun part.... Lori Whitlock is having TWO giveaways!   When you enter to win, please specify which you'd like to win. 


Enter to win here!!


As if that wasn't enough... here's a coupon code for 30% off your entire purchase at Lori Whitlock's store

Next up.......


You're almost done... hop on over to Lisa Bell's Blog and check out her Christmas Cards.

In case you want to go back to the beginning or catch any you may have missed, here's the entire list:


Thanks for playing along!   See you soon!!!

Friday, November 1, 2013

I'm a New Member of the Lori Whitlock Design Team - AND - A November 4th Blog Hop!!


I'm so excited to announce... I am now a design team member for Lori Whitlock!  I have been dying to share the news!  If you aren't familiar with Lori Whitlock, check out her blog.  She creates amazing digital files that can be used with the Silhouette or other digital die cutting machines, she creates fabulous digital papers and elements that are perfect for those hybrid scrappers and digital scrapper, she even designs for Echo Park.  You can find her products at Jessica Sprague, The Silhouette Online Store, or right there on her blog.

To announce all of the new design team members and reintroduce you to a few returning members, we invite you play along in a Blog Hop on November 4th.  We will be showcasing Christmas Cards!  Now is the perfect time to start making those homemade Christmas cards for your loved ones.   Join in on the blog hop to get some inspiration and fun ideas!   There are even a few giveaways and a discount code along the way!   The blog hop will start on Lori's Blog:


See you there!!!!

Tuesday, October 22, 2013

Make a 12 x 12 Grid Overlay for your Scrapbook Pages using the Silhouette

Hello there!  I made a couple of quick videos demonstrating two different ways to make a grid overlay using your Silhouette Cameo.  Super fun!  Email me if you have any questions


Tuesday, October 15, 2013

Epiphany Crafts "Boo to You" Halloween Project


Hello again! 

Did you see my fun Halloween project posted on the Epiphany Crafts blog?  It's the one pictured above. 

It was so much fun to make!   It was made with a 4-pack of Starbucks Frappuccino.  You can find all of the instructions on the Epiphany Crafts blog post.  Can you tell how much I am loving the Epiphany Crafts Shape Studio Round 25 tool?    Now you know what I am doing with the freebies I have been offering!  

Wednesday, October 9, 2013

Masculine Birthday Card with Heidi Swapp No Limits and Epiphany Crafts


Hi there!  I am back again with another birthday card.  This time I used Heidi Swapp's No Limits and the Epiphany Crafts Shape Studio Round 25 Tool.  This was a super easy, super quick card to put together using the No Limits Paper pad available at Michaels.  All of the embellishments are part of the paper pad with the exception of the "birthday" stamp.


Sunday, October 6, 2013

Thank You Apple Card with Epiphany Crafts Studio Round 25 Tool

My co-worker brought me a bunch of apples from his tree.  I wanted to send he and his wife a thank you card.  I found this cute card in the Silhouette store.  I added just a simple bow and a "thank you" using a stamp by Hero Arts which works perfectly in the Epiphany Crafts Studio Round 25 tool.


Friday, October 4, 2013

Halloween Freebies!!!!


I made some Halloween Freebies for you!  If you'd like to download the freebies, click on the picture above!    The smaller rounds will fit perfectly in the Shape Studio Epiphany Crafts Round 25 Tool.  Happy Halloween!!!

Wednesday, October 2, 2013

Sympathy Card


Sympathy cards are one of the hardest for me to make.  I always worry that my card will look too "happy" or too "cute", but then again, I don't want it to look "sad".   For this card I used Heidi Swapp's Sugar Chic paper pad and a color magic butterfly.  I think the soft colors of the papers keep this card perfectly acceptable as a sympathy card.

In addition to Heidi's paper products I used a Kraft card base, nestabilities, washi tape and some pearls.

On the inside I put a poem that I read at a recent funeral, I think it's perfect for a card.  Here is a copy of the poem.  Feel free to use it on your next sympathy card.

His Journey's Just Begun
By Ellen Brenneman

Don't think of him as gone away--
his journey's just begun
life holds so many facets
this earth is only one.


 Just think of him as resting
from the sorrows and the tears
in a place of warmth and comfort
where there are no days and years.

Think how he must be wishing
that we could know today
how nothing but our sadness
can really pass away.


And think of him as living
in the hearts of those he touched...
for nothing loved is ever lost--
and he was loved so much.

Monday, September 30, 2013

Wedding Layout for Ashlea using Heidi Swapp Sugar Chic


I have not completed a traditional 12 x 12 layout in awhile.  Ashlea and Richie have some really cute photos from their wedding and I would like to scrap them all into one album.  We will see how that goes!

I started with a sketch for this layout, but it's far from what the sketch looked like.  Isn't that the fun thing about working with sketches.  They just get "the ball rolling" for you.


As usual you can see I used a lot of Heidi Swapp Sugar Chic collection for this layout.  A bit of sewing for some dimension, a punch for the scallops and the ever fun color pop banners.


Sunday, September 29, 2013

Trick Or Treat Card with Echo Park Apothecary Digital and Silhouette Cameo

Hello there! 

If you had a choice... trick or treat?  I will always chose a treat!  So much fun Halloween Candy out there.  Do you have a favorite?

I made this hybrid card with the Silhouette.  I used some digital elements by Echo Park Apothecary.
It's one of my favorite Halloween kits of all time.  I simply brought the elements into my Silhouette, sized them accordingly and then just traced and cut them out.  Even the background paper was printed on my printer.  

If you'd like more information on how to make this card, let me know in the comments section and I will get you more details.

Sunday, September 22, 2013

Halloween Treat Boxes with the Epiphany Crafts Studio Round 25 tool and Chillingworth Manor Halloween Papers


Hello there!  Can you believe Halloween is just around the corner?  Here in Indiana the air is getting crisper, and the leaves are beginning to change.  The little trick-or-treaters will soon be ringing the doorbell.  I've got the cutest little boxes to add a little pizzazz to their treats.

I created the boxes using my Silhouette Cameo and a shape from the Silhouette store.  The size is perfect to fit little minature candybars inside.  I can also cut 4 boxes out of one 12 x 12 sheet of paper.

The Epiphany Crafts Shape Studio Round 25 tool and bubble caps are the perfect size to add a little bling to the boxes.

Friday, September 20, 2013

Welcome Baby Card with the Epiphany Crafts Studio Round 25 Tool and the Silhouette Cameo

I made a fun little baby card this week for Epiphany Crafts.  It never ceases to amaze me just how many ways you can utilize the Shape Studio Round 25 tool!  I made a custom sentiment that says, "Welcome Baby" using the Round 25 punch and bubble cap.

I cut the card base (A2 size) on the Silhouette Cameo.  I used Maggie Holmes Crate Paper collection for the trim on the onsie.  The ruffle was made by simply sewing a ribbon across the top of a piece of tulle which was approximately 12" long.  I just added a strip of adhesive to my card base and gathered the ribbon as I attached it to create the cute ruffled look.


Tuesday, September 17, 2013

Epiphany Crafts Studio Shape Round 25 Tool Freebies

A few more freebies for you.  Let me know if there is something specific you'd like to see for use with your Epiphany Crafts tools.  I will be working on other shapes soon.  Did you know you can change the colors of the freebies (or any elements) very simply by using Photoshop?   I'll show you how.

First open up the freebies in Photoshop.  File, Open, Navigate to where you downloaded them and click open.


There are several ways to change colors.  The easiest way is to adjust hue/saturation.  To do this you will choose image, Adjustments, Hue/Saturation.
 A screen will pop up and you can just slide any of the sliders to change the color of the elements to match your project. Here I have turned them Blue.


and here is a pink variation


and how cool is this grey?


Like I said, there are lots of ways to change the colors of element in photoshop.  I think this one is the easiest, but I will show you another way next time that uses colors from your layout to recolor the elements to ensure an exact match.

The possibilities are endless and you get much more mileage out of your elements when you can customize them to match your specific project(s).

Download these freebies HERE.
view sourceprint? 01 09 10